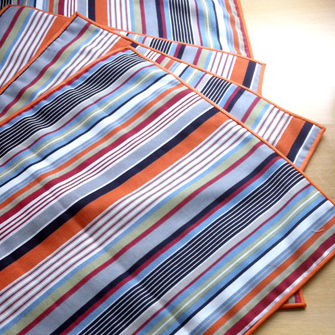
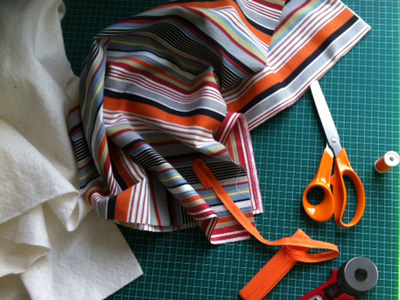
Some of my best project ideas come to me when I’m browsing though fabric stores. When I saw this striped material I wanted to make place mats, with a bright orange binding.
I started by working out some measurements for the mats. I laid out my (small) dining table as though for guests, and measured just how big I could make my mats, without having them overlap. I would really recommend this method of customization, after all if you make something yourself, why not make it bespoke?
I wanted my mats to comfortably accommodate a large dinner plate as well as glasses & cutlery, even a napkin for posh days, and came up with a finished size of 51.5cm x 37cm (approx 20″ x 14 1/2)”.
Materials – fabric, batting, bias binding, thread
Each mat has a back and a front, and sandwiched in between is a piece of batting, I used cotton batting.
The fabric I used was a light upholstery weight cotton fabric, and the bias binding was of the shop bought variety, 1cm wide.
Cutting list – front, back & batting
For each place mat I cut out:
- 2 x pieces of striped fabric 52cm x 38cm (cut out side by side on the fabric)
- 1 x piece of batting 52cm x 38cm
- 1 x 2 m (approx length of bias binding – this allows enough tape for turning round the corners and the final joining process.
Cutting diagram – for striped / patterned fabric

I made my life a bit difficult when I chose the stripey fabric, as I soon realized I wanted the stripes to line up on the front and the back of the place mats, where they met at the side seams.
I achieved this by marking out my two place mat rectangles side by side on my material, following the same horizontal fabric stripe, and cutting carefully with a rotary cutter.
By following the printed stripes on the fabric, I ensured that I would be able to match up the stripes for the front and back pieces, when I assembled them.
Making up -basting
I assembled each place mat laying the components flat on my worksurface – back fabric (right side down), then batting, then front fabric (right side up).
I hand basted the fabric/batting/fabric sandwich together using a needle and contrasting thread with long running stitches. I sewed across the whole mat to prevent the fabric from slipping when I sewed it together.
I find it best to keep the work on a flat surface when basting, it helps keeps all of the layers together.
I didn’t take my stitches right up to the edge of the mats, as I would be trimming down the edges later on.
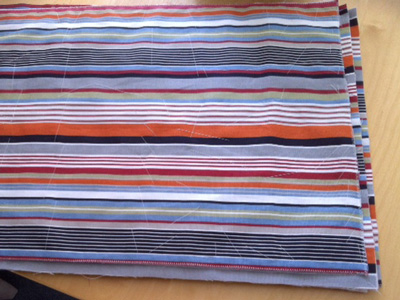
Making up – trimming & edge zig zag
I used a rotary cutter to trim all four edges of the place mat down to my finished size of 51.5cm x 37cm, squaring up the mat edges with the grid layout on my cutting mat.
I then machine sewed all three layers together, using a wide zig zag stitch, (you can see the hand basting stitches in the picture as well as the machine zig zag stitches.)
Finishing
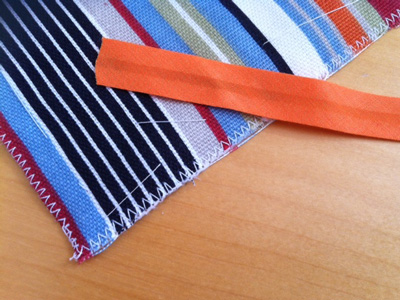
For the final step, I bound the zig zagged edges with bias binding, lining up the edge of the binding with the edge of the place mat, right sides together, and sewing the binding to the mats with a straight machine stitch.
place mat binding 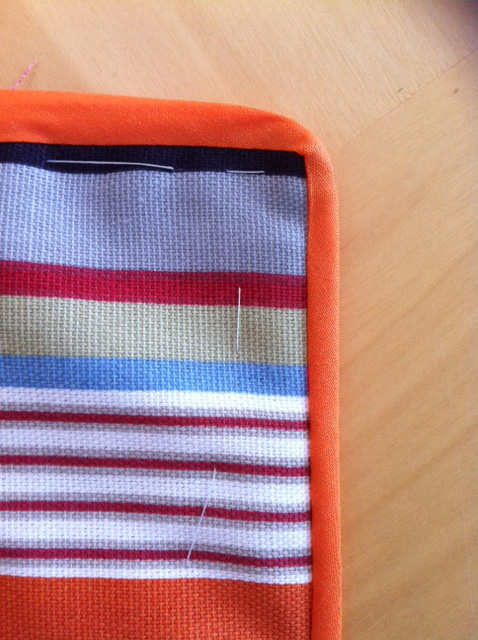
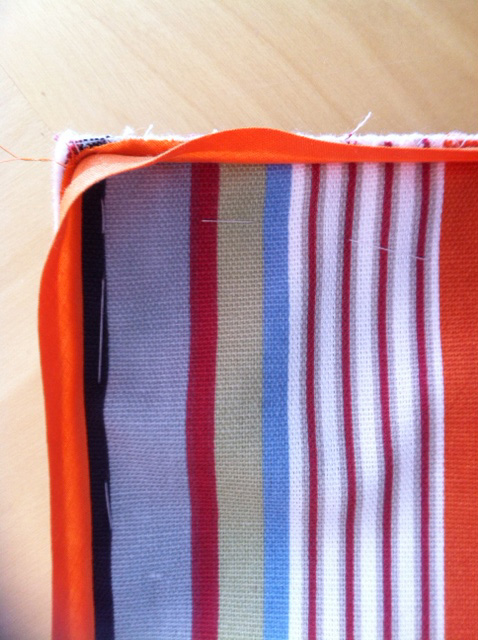
place mat binding – pressed
At this point, when the layers are firmly sewn together, I removed the basting stitches.
I pressed the binding flat, rolled it over the raw edge of the seam, and hand sewed the back of the binding in place. For details on applying bias binding, I recommend searching the internet for some of the many excellent bias binding tutorials that explain this process in detail if its not familiar to you.
My Top Tip
Press at every stage with an iron, if the fabric is flat with no creases or wrinkles there is less margin for error,
also pressing fabrics helps the fibres bond a little and the material stays in place with less movement when you start to sew.